
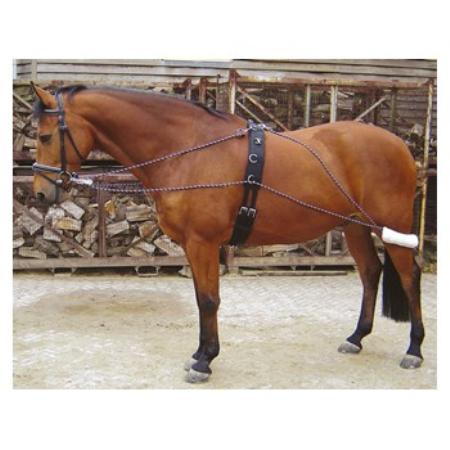
Details
BENEFITS
PROMOTES MUSCLE DEVELOPMENT
The Best on Horse training system helps build neck and back muscles.
BALANCE
Introducing your horse to the Best on Horse training system helps him find balance. This will help your horse balance the weight of the right step by using his hindquarters to find the correct balance.
GUIDE
As with all training, it is best to start slowly for a short period and then gradually increase. Therefore, it is suggested to start with a working trot and, once the trot is established and your horse is balanced, move on to the canter.
NOTE: To prevent your horse from becoming stiff and sore, keep the work session to a reasonable length. Any adjustments must be made at the back of the system.
ASSEMBLY INSTRUCTIONS
STEP 1
Hook the rear strap carabiner into the top ring of the girth, then thread the strap through the rear pulley.
STEP 2
Pass the strap through the ring in the middle of the girth and attach it to the bridle. Do the same on the other side.
STEP 3
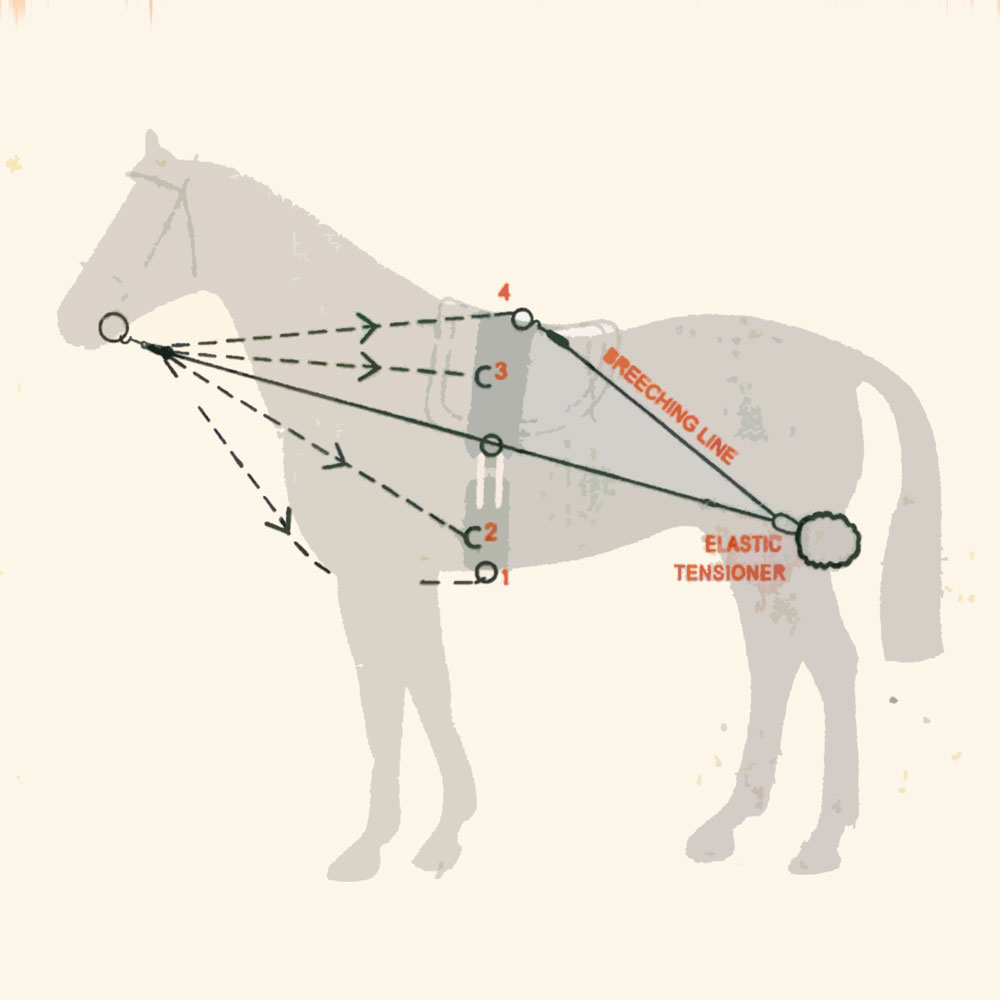
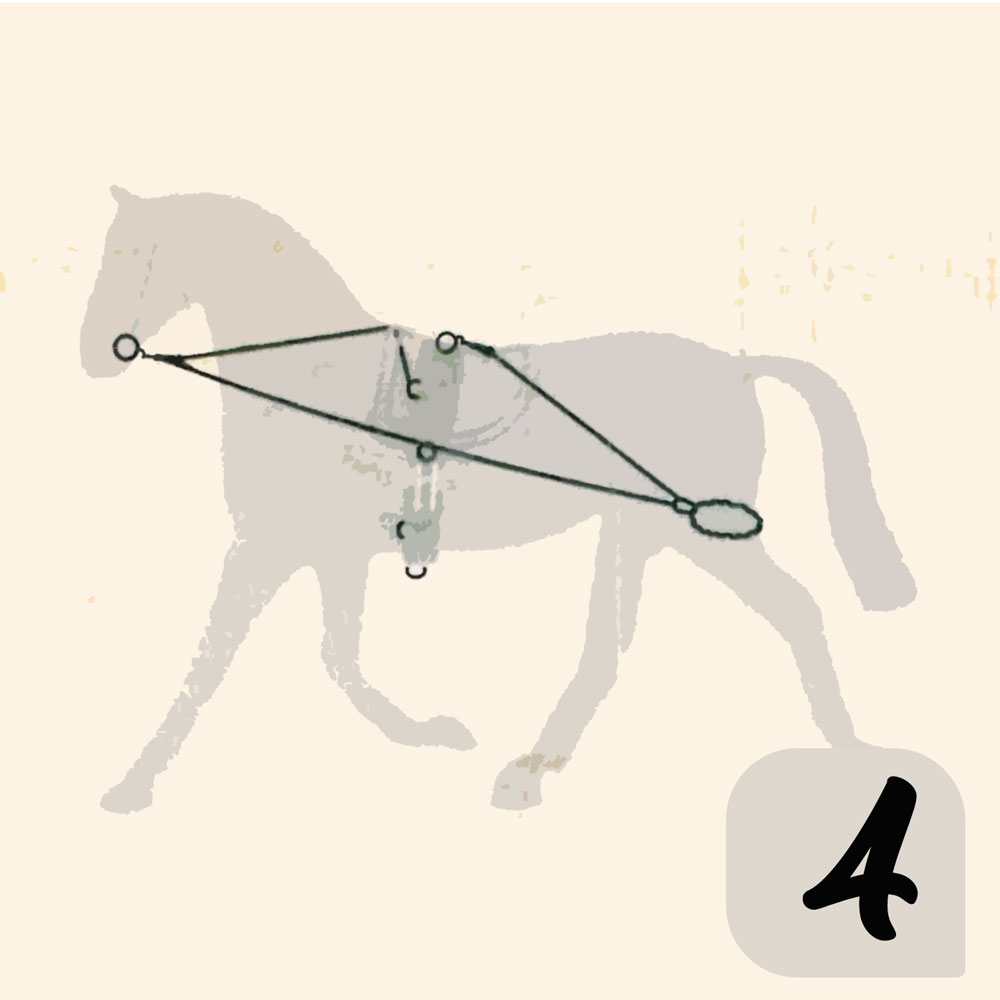
Hold the loose strip in the desired position. During the first weeks of work, it is recommended to use position 1 (see drawing), that is, with the belt attached to the pulley and passing it between the horse's legs.
STEP 4
Make sure the horse's head is in the correct position when walking. Don't restrict your horse too much.
1) STRETCH THE TOP LINE
When using the Best on Horse training system for the first time, always start in position one. This encourages the horse to lengthen the topline and create proper muscle tone. You can use the system about 2 or 3 times a week in 20 minute sessions. Use it in this position for at least six weeks before moving on. Some users prefer to use only this position.
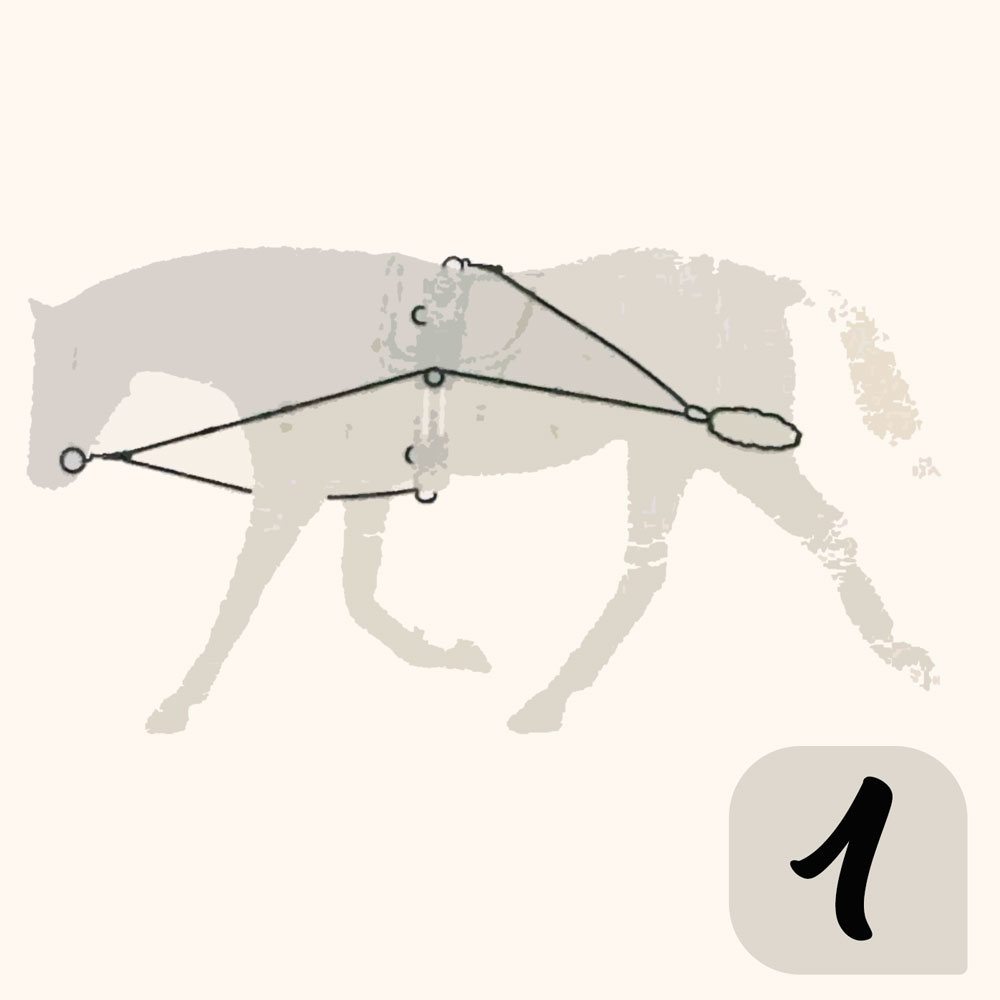
2) HOCK COORDINATION
This prevents the horse from hitting the front and allows him to coordinate his front hocks. Connect the ends to ring number 2 (see drawing).
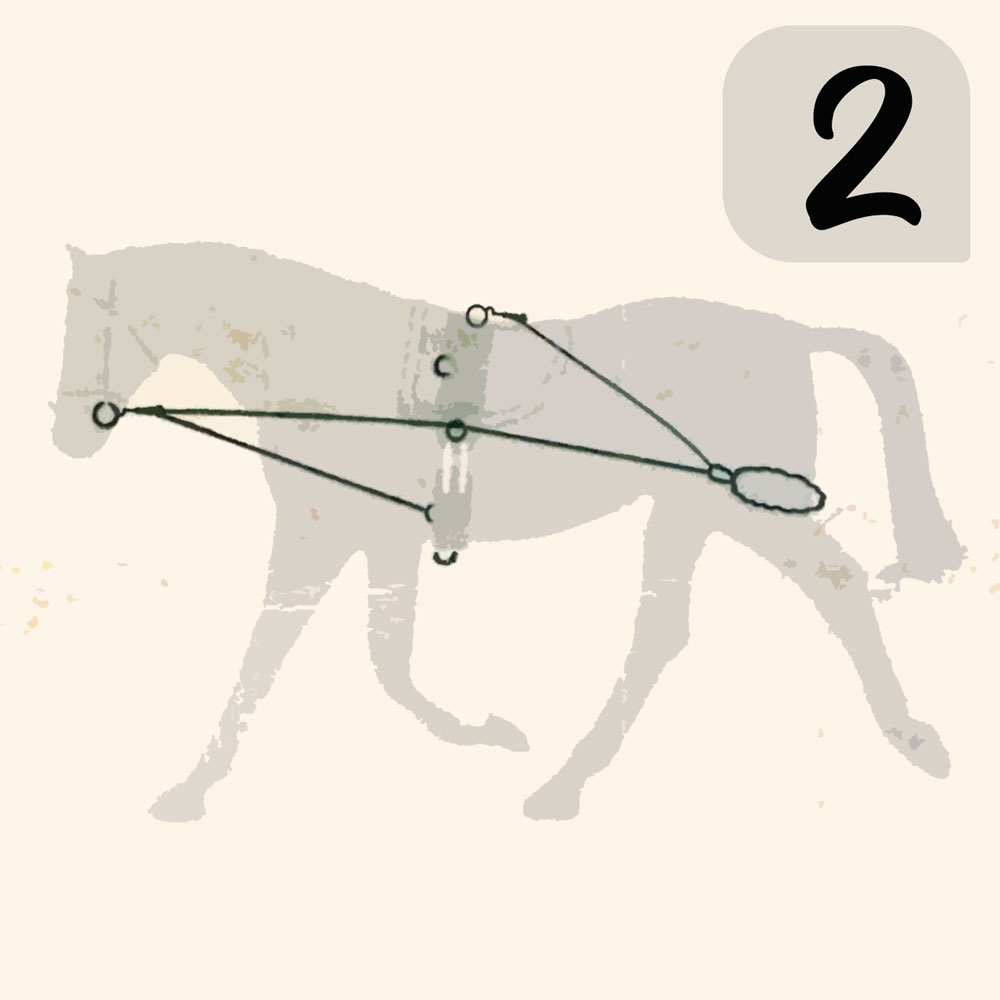
3) INTERMEDIATE
The horse should be relaxed from the jaw and throughout the topline.
This allows the horse to better coordinate the hocks and find the correct balance when galloping.
4) ADVANCED
This position is only recommended for professionals with horses who work and compete at an advanced level. Fit the loose strap into ring number 3 (see drawing).
The black faux leather comes with velcro, which makes it easy to clean.
Includes two pulleys with their carabiners.
One size fits all.
Related products
We have assembled a carefully selected range of products, chosen for their quality and price balance.
Ask for information about this product
Request information about this product! Fill out our form and we will contact you as soon as possible!

